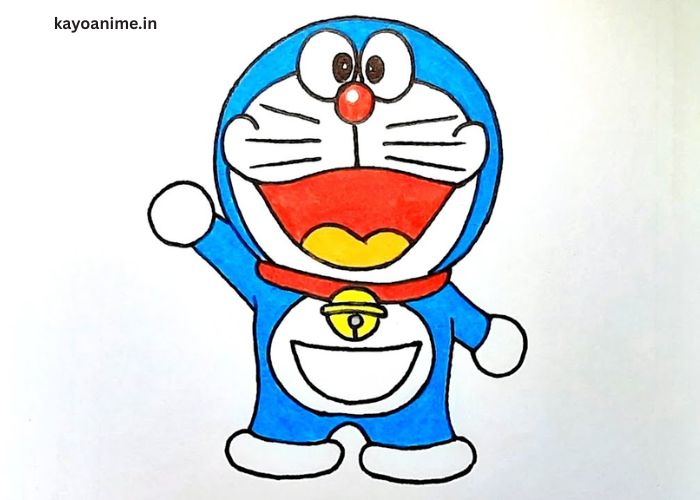
Doraemon is one of the most beloved and iconic characters in Japanese animation. This blue robotic cat, with his round face, big eyes, and signature pocket that holds magical gadgets, has captured the hearts of audiences worldwide. Drawing Doraemon can seem like a fun and creative task, but many might find it a bit challenging to get the proportions and details just right.
In this guide, we will show you how to draw a cute Kawaii version of Doraemon in simple steps. Whether you are a beginner or an experienced artist, this tutorial will make the process enjoyable and easy to follow. With just a few basic shapes and steps, you can create an adorable Doraemon drawing that captures his lovable character.
3 Key Points:
- Creating a Kawaii Doraemon is simple and fun.
- This guide will help you through each step of the drawing process.
- You’ll need basic drawing tools to get started.
What is Kawaii Art, and How Does It Relate to Doraemon?
Kawaii is a Japanese term meaning “cute” or “adorable,” and it’s a prominent style in both art and pop culture. This style is characterized by rounded shapes, exaggerated facial expressions, and endearing features. The goal of Kawaii art is to invoke feelings of warmth, happiness, and affection in the viewer.
Doraemon, being a character with large eyes, a round face, and a simple design, fits perfectly within the Kawaii style. His charming appearance is what makes him so relatable and lovable to fans of all ages. By drawing Doraemon in Kawaii style, you can emphasize these features, making him even cuter and more appealing.
When drawing Doraemon in the Kawaii style, focus on adding extra cuteness through the proportions, expressions, and soft curves. For example, enlarging the eyes, simplifying the nose, and adding blush marks can give the drawing a more Kawaii feel.
Reminder: Don’t worry about perfecting every line. Kawaii art is about capturing the essence of cuteness rather than exact details.
What Materials Do You Need to Draw Doraemon?
Before we dive into drawing, let’s gather the necessary materials. Drawing Doraemon requires only a few basic items, making it easy for anyone to start. Here’s what you will need:
- Pencil – A regular drawing pencil for sketching out shapes and outlines.
- Eraser – To correct any mistakes or refine your drawing.
- Paper – A piece of drawing paper, preferably white or cream-colored.
- Markers or Colored Pencils – For adding color to your Doraemon drawing.
- Black Pen – For outlining and making the final details stand out.
You don’t need anything too fancy. Just make sure you have a good eraser to clean up your sketching lines. A black pen or fine marker will be helpful for outlining, and you can use colored pencils or markers for the final touches to bring your Doraemon drawing to life.
| Material | Purpose | Recommended Type |
| Pencil | For sketching basic shapes | HB or 2B pencil |
| Eraser | To remove sketching errors | Soft, non-abrasive eraser |
| Paper | Drawing surface | White or cream drawing paper |
| Markers/Colored Pencils | To color in the drawing | Any coloring tools you prefer |
| Black Pen | To outline the drawing | Fine-tip pen or marker |
Reminder: You can use any colors you like, but Doraemon’s signature blue and red will give you the most recognizable look.
How Do You Draw Doraemon Step by Step?
Now that you have all your materials ready, let’s break down how to draw Doraemon in easy steps. We will keep it simple and fun, so you can enjoy the process without feeling overwhelmed.
Step 1: Draw Doraemon’s Head
Start by drawing a large oval shape for Doraemon’s head. This will be the foundation of your drawing. Make sure to keep the lines soft and round, as this adds to the Kawaii style. Once you have the oval, draw two smaller ovals for Doraemon’s ears on each side.
Next, add a small curved line in the center of the oval for the mouth. Doraemon’s face is round, and his mouth sits just below the middle of the oval. Don’t forget to leave enough space for his big eyes!
Step 2: Add Doraemon’s Eyes and Nose
For the eyes, draw two large circles inside the head oval. Make sure the eyes are symmetrical, as Doraemon’s character design is very balanced. Inside each eye, add smaller circles to represent the pupils and fill them in with black. Leave a tiny white spot in the middle of each pupil to give the eyes a shiny, lively effect.
Now, for the nose, draw a small circle right in the middle of the face, just below the eyes. Color it red to match Doraemon’s iconic look.
Step 3: Draw the Mouth and Whiskers
To complete the face, draw a wide, curved line beneath the nose for the mouth. Add two small curved lines on either side of the mouth to represent the cheeks, and draw three whiskers on each side of the face. The whiskers should be short and spaced out evenly. These whiskers are one of Doraemon’s most recognizable features!
Step 4: Add Doraemon’s Body and Pocket
Next, draw Doraemon’s small round body. The body should be much smaller in proportion to the head, which is a classic Kawaii trait. At the center of the body, draw a little pocket with a rectangle shape. This is where Doraemon stores his gadgets! You can add a small line inside the pocket to give it depth.
Step 5: Final Touches and Coloring
Now that you have the basic outline, it’s time to add color. Doraemon’s fur is blue, and his belly, face, and hands are white. Use red for his collar and nose. Don’t forget to color the eyes’ pupils in black, leaving a small white highlight.
For the final touch, outline your drawing with a black pen or marker to make the lines stand out.
What Are Some Tips for Enhancing Your Doraemon Drawing?
To make your drawing even more interesting, here are a few extra tips:
- Add Expression: You can create different emotions by adjusting Doraemon’s mouth and eyes. For example, a small curve can make him smile, while a larger curve can make him laugh.
- Use Color Variations: While blue and red are the classic colors for Doraemon, you can play around with different shades to give your drawing a unique look. For example, using a lighter blue or darker red can add depth to the drawing.
- Add Accessories: Doraemon is known for his gadgets. You can draw some of them in his pocket, like the “Take-copter” or “Anywhere Door,” to make your drawing more fun and creative.
Conclusion
Creating a cute Kawaii Doraemon drawing is not only fun but also an opportunity to practice your art skills. By following these easy steps, you can create a lovable version of Doraemon that’s perfect for both beginners and seasoned artists. Remember, the key to Kawaii art is focusing on rounded shapes, soft lines, and expressing cuteness in every detail.
If you love drawing, don’t be afraid to experiment with colors, expressions, and accessories to make your Doraemon drawing unique and personal. With a little creativity, you’ll be able to capture the charm of this iconic character in a way that’s all your own.
FAQ’s
- How long does it take to draw Doraemon?
It usually takes about 30 minutes to an hour to complete a simple Kawaii Doraemon drawing, depending on your skill level and how detailed you want to get. - What if I make a mistake while drawing?
No worries! Use your eraser to fix any mistakes and adjust the lines as needed. Kawaii art is forgiving, and making changes is part of the fun. - Can I use digital tools to create a Doraemon drawing?
Absolutely! You can use digital drawing tools such as Procreate or Adobe Photoshop to create a Doraemon drawing. The steps are the same, but you’ll have access to layers, colors, and other digital features. - Can I make Doraemon look different?
Yes! You can change Doraemon’s colors, add accessories, or even give him different expressions to make your drawing unique. - Where can I find references for drawing Doraemon?
You can find plenty of Doraemon images online or watch episodes of the show to study his design. There are also many tutorials available on YouTube to help you get started.